These reusable snack bags are easy-peasy, even for beginners! Machine and hand-sewing instructions included. Bonus: they’re machine washable too!
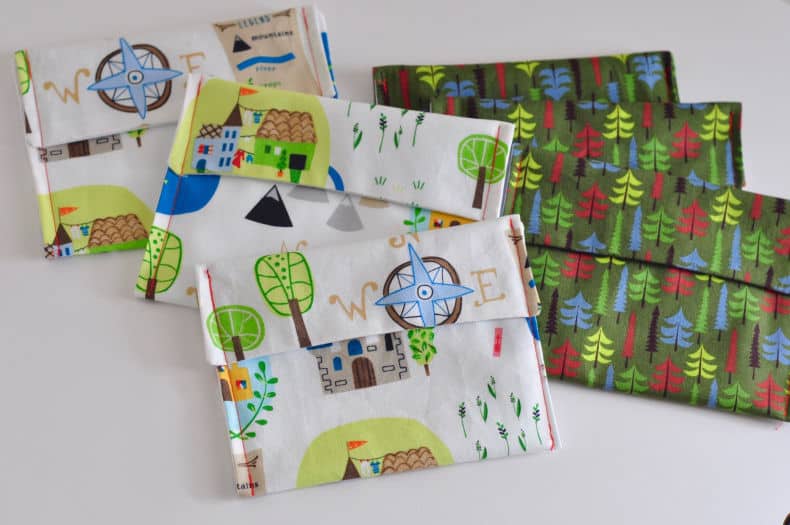
Reusable Snack Bags: Original post by Cheyenne Bell in 2015. Updated by Red & Honey for clearer instructions & new photos in 2020.
As a mom of a very hungry toddler, snacks are something we just can’t live without. Since she’s been able to feed herself, Aislin has always used one of those snack cups with the plastic lids that she’d just stick her hand in and grab a handful of cheddar bunnies.
But those cups soon became the bane of my existence. They did not fit nicely in my bag and all the crumbs would inevitably find their way out of the opening and into the crevices of my purse. I needed something different, something convenient, something simple and toddler friendly. Naturally, I consulted Pinterest. (C’mon, you do it too!)
Briefly, I had considered using plain old plastic baggies but I didn’t like the thought of using all that plastic and, frankly, I’m kind of cheap. Using plastic baggies for every snack would get expensive quickly.
When I came across some Pins of reusable snack bags, it was like a light bulb lit up over my head.
That’s what I needed! I looked at about a dozen different tutorials but none of them were exactly what I wanted: easy to make, easy to use, no zippers or Velcro, machine washable, cute, toddler friendly. So I did what I normally do and made my own design.
In the interest of full disclosure, I warn you that I am not a very good seamstress. I am really good at sewing a straight line, but that’s about it. So don’t worry if you aren’t good at sewing.
If I can do this, so can you. I promise. Just give it a shot!
Supplies:
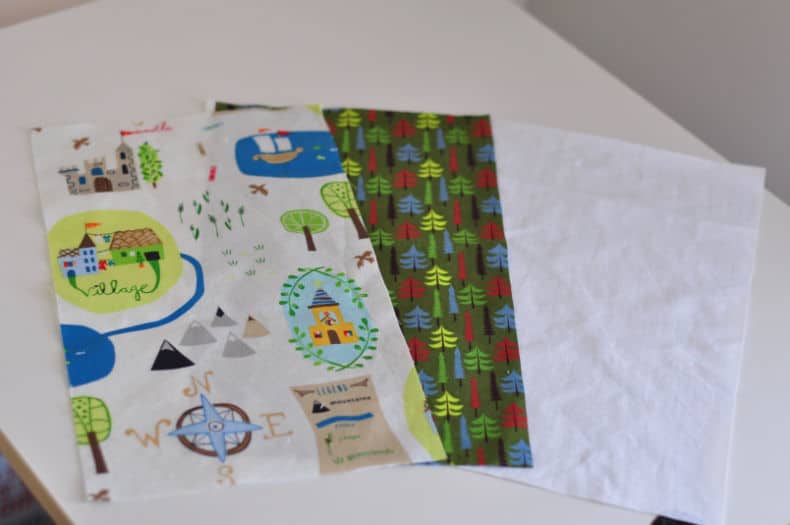
- Two or three coordinating cotton fabrics of your choice (about a quarter or a half yard of each will be plenty)
- Ripstop nylon fabric in color of your choice (I ordered a yard and have a LOT left so 1/2 a yard should work)
- Coordinating thread
- Sewing machine
- Pins
Optional Supplies:
- Cutting Mat
- Rotary Blade
- Acrylic Sewing Ruler
- Cardboard or thicker paper to create a template
- Thimble
Reusable Snack Bags: Machine Sewn Tutorial (Hand-Sewing Instructions Below)
Note: generally, you should wash and press all your fabric before you begin a project. In this case, it’s a good idea to do so with your cotton fabrics, the ripstop should be washed but you can let it hang dry, don’t press the nylon.
Step 1:
Cut the cotton fabric and nylon into rectangles 12″ long by 7″ wide. This will leave you with a snack bag around 5″ X 6″.
I created a 12″x7″ paper template to help keep my measuring accurate, and used the acrylic ruler to guide my rotary blade while cutting on the cutting mat.
Steps 2:
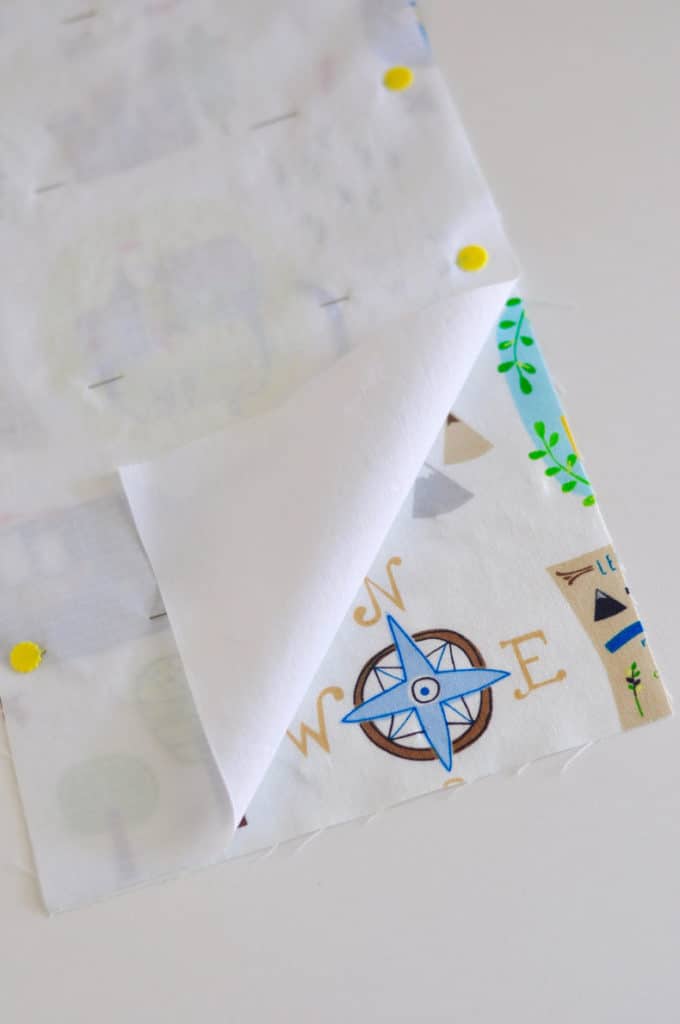
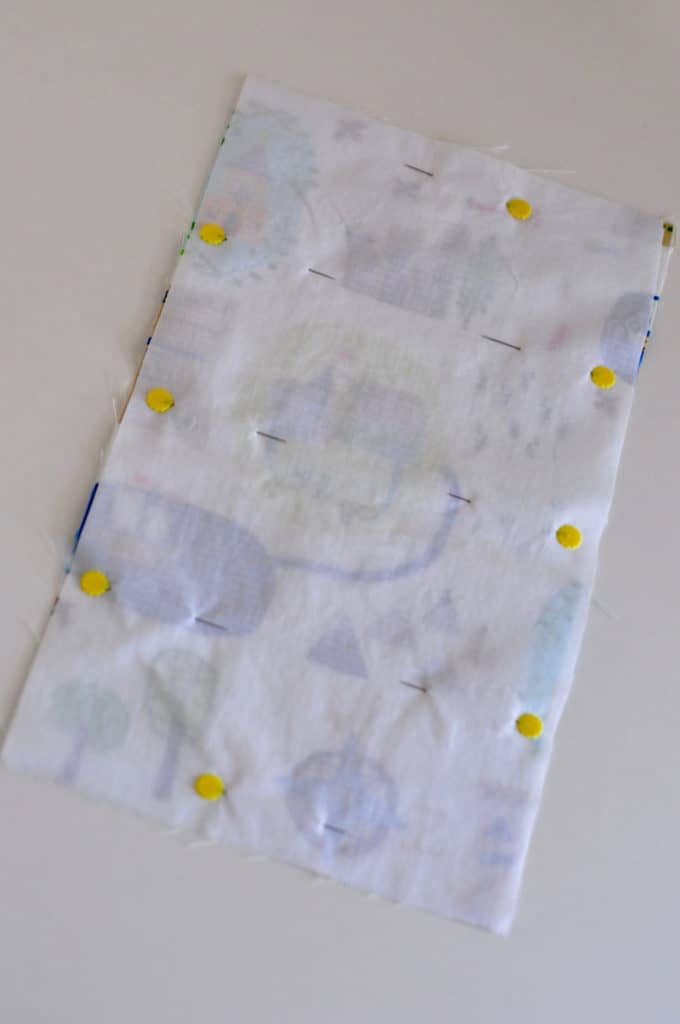
When all your fabric is cut take one of the cotton rectangles and one of the ripstop rectangles and place them right-sides together. Square up the sides and pin around the border.
Step 3:
Start sewing!
Starting about halfway down one of the long sides of the reusable snack bag, leaving 1/4 seam allowance start sewing. Remember to reverse stitch a couple of times at the beginning so your stitches don’t unravel AND to remove your pins before you come to them. Sewing over one can damage your machine and break a needle.
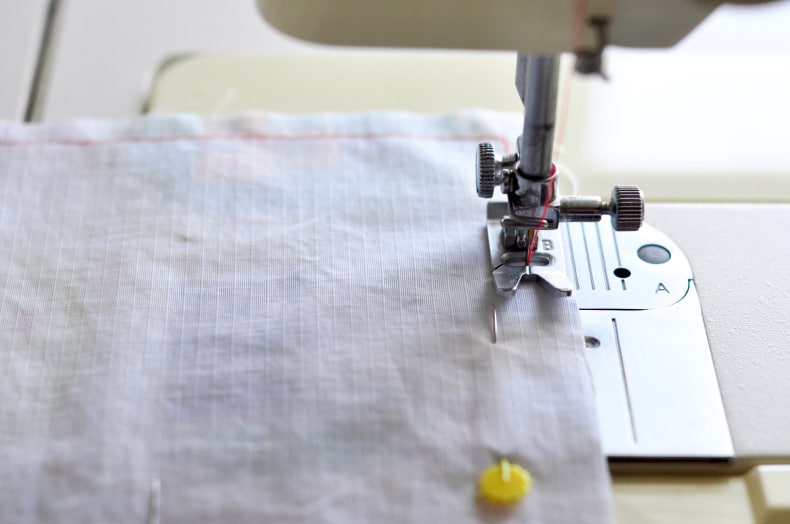
Sew all around the entire rectangle, leaving a two inch gap in your stitching between where you started and where you end, so that you can turn your snack bag right side out. Make sure to reverse stitch a couple times to lock those stitches in place. You should now have the two pieces completely sewn together except for a 2″ gap on one of the long edges.
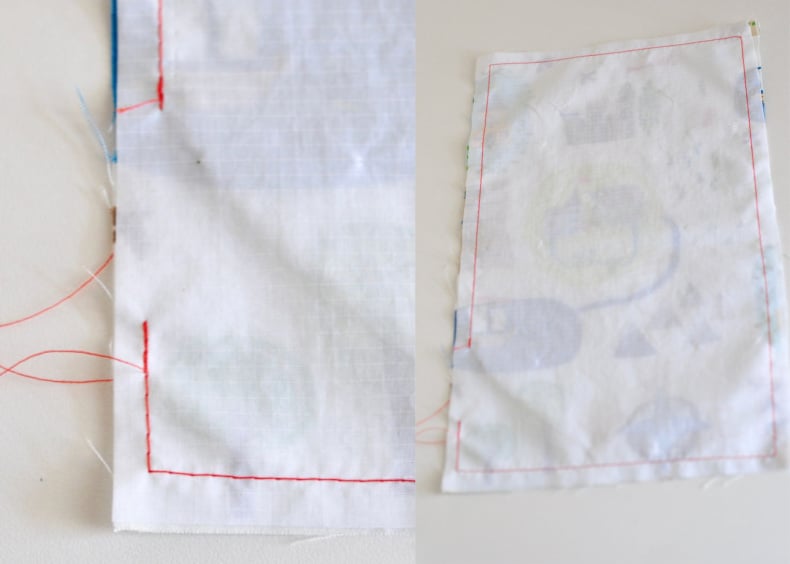
Step 4:
Next, carefully cut the corners off the rectangle, but be sure not to cut your stitches! Cutting the corners helps to make sure the corners of your final piece are nice and pointy when you turn the fabric right side out.
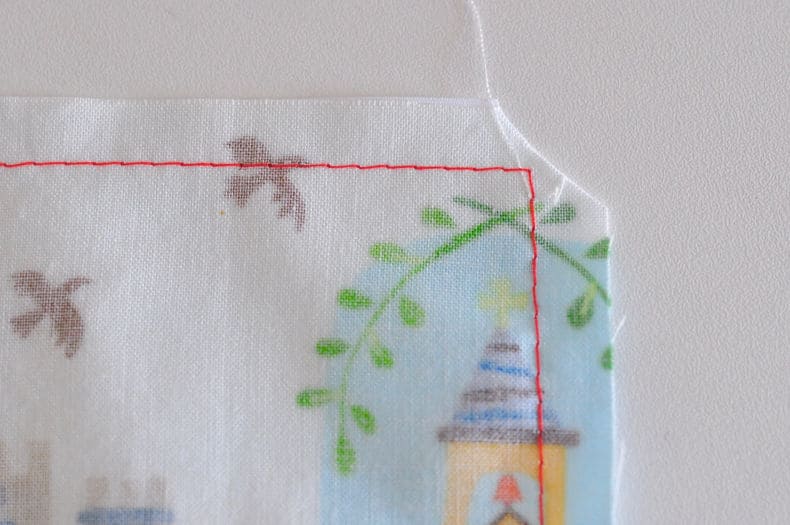
Step 5:
Turn your fabric right side out and push the corners out with your pinky finger, a small awl or the eraser end of a pencil.
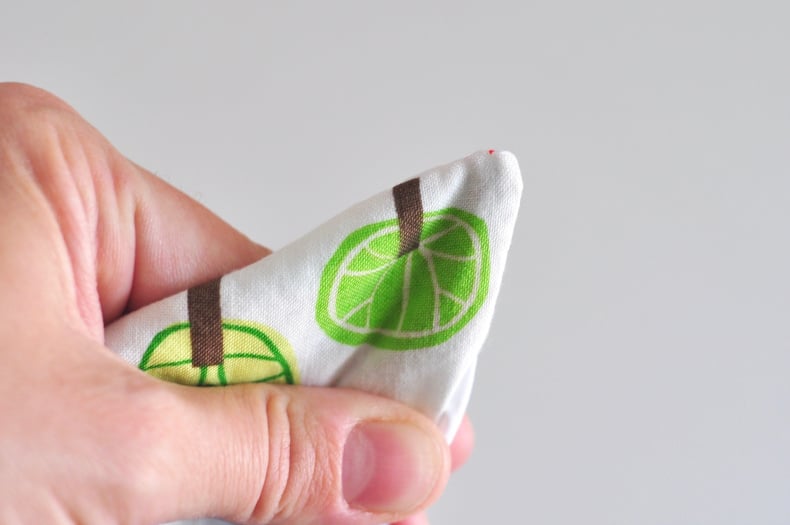
Step 6:
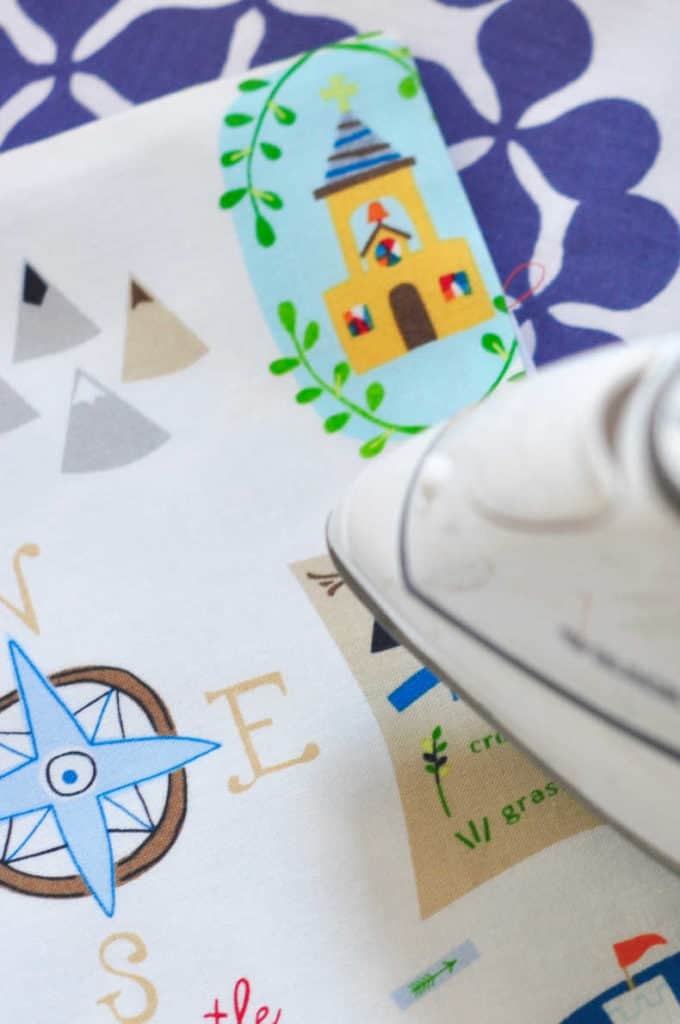
Take your rectangle over to the ironing board and iron out all the wrinkles. Be sure to iron the cotton fabric side, not the ripstop side.
Also make sure the seam allowance of your gap is folded in. Ironing helps make the fabric nice and flat and also makes it easier to sew in the next step.
Step 7:
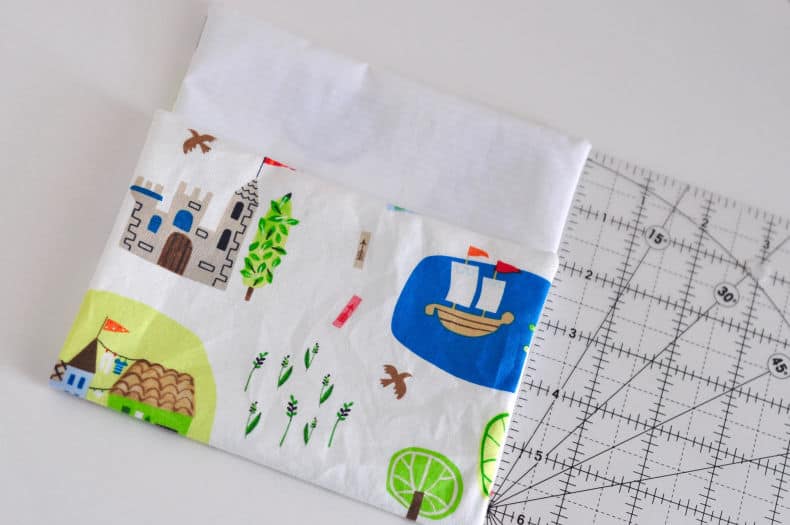
Once your rectangle is nice and ironed, place it ripstop side up on a flat surface and fold one of the short ends up toward the other short end, leaving about two inches at the top.
Step 8:
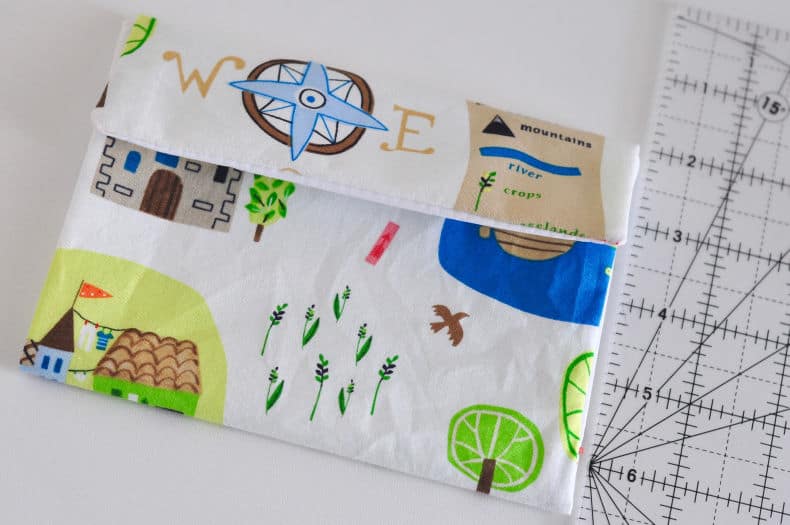
Then fold that remaining two inches down over the other end, creating a flap. Your rectangle should now look like an envelope. Pin the flap in place and head back over to your sewing machine.
Step 9:
Place one of the short edges under the needle and getting as close to the corner and edge as possible, begin your stitching (remember to reverse stitch). Continue down the edge and sew the entire side shut (including the flap). Be sure to reverse stitch at the end of stitching down the side.
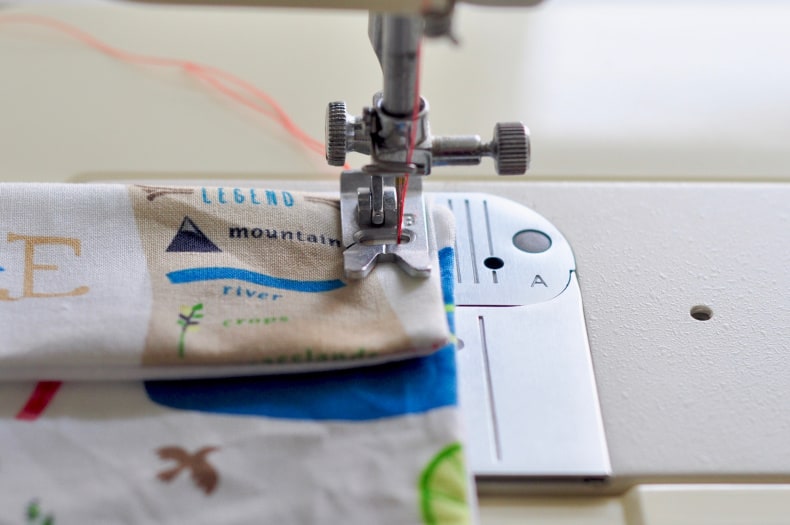
Do the same thing to the other side.
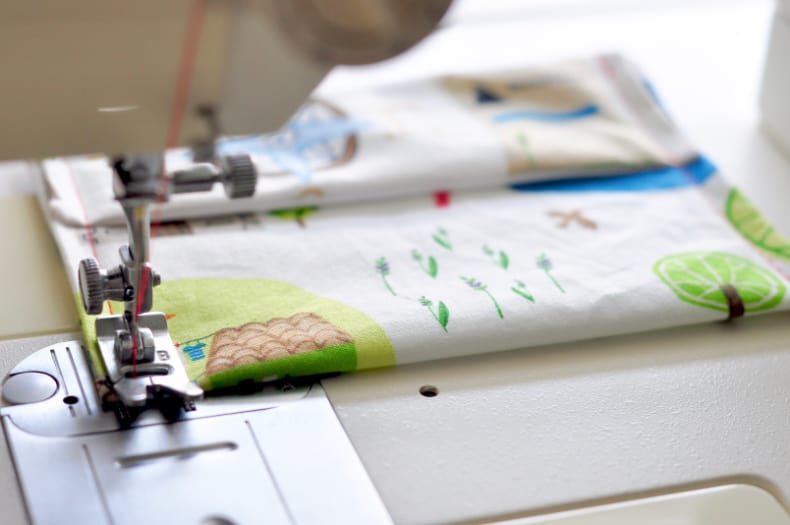
All done! You’ve made your very own reusable snack bag!

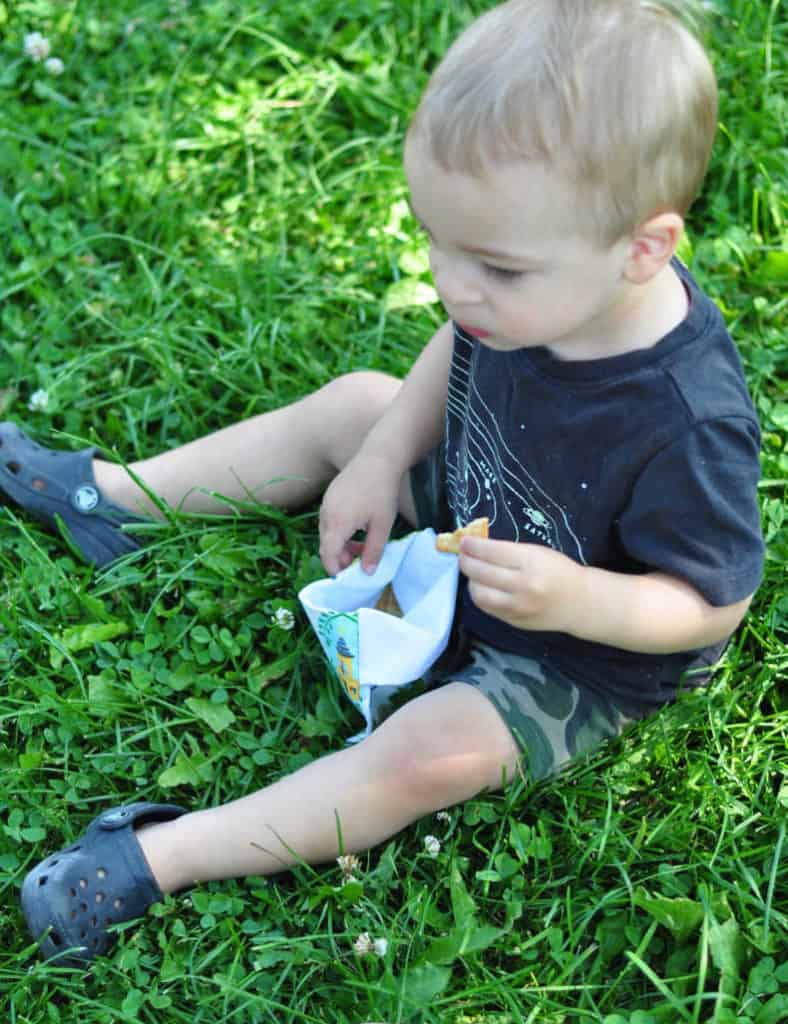
To open the bag, you just flip the flap up and push out the corners. Fill it with your kiddo’s favorite snack and you’re good to go!
Reusable Snack Bags: Hand Sewing Instructions:
Note: The instructions are fairly similar to the machine sewn option. The biggest difference being the type of stitching. In general it’s a good idea to wash and press all your fabric before you begin a project. In this case, it’s a good idea to wash and press your cotton fabrics, the ripstop nylon should be washed but you can let it hang dry, don’t press the nylon.
Step 1:
Cut the cotton fabric and nylon into rectangles 12″ long by 7″ wide. This will leave you with a snack bag around 5″ X 6″.
I created a 12″x7″ paper template to help keep my measuring accurate, and used the acrylic ruler to guide my rotary blade while cutting on the cutting mat.
Steps 2:
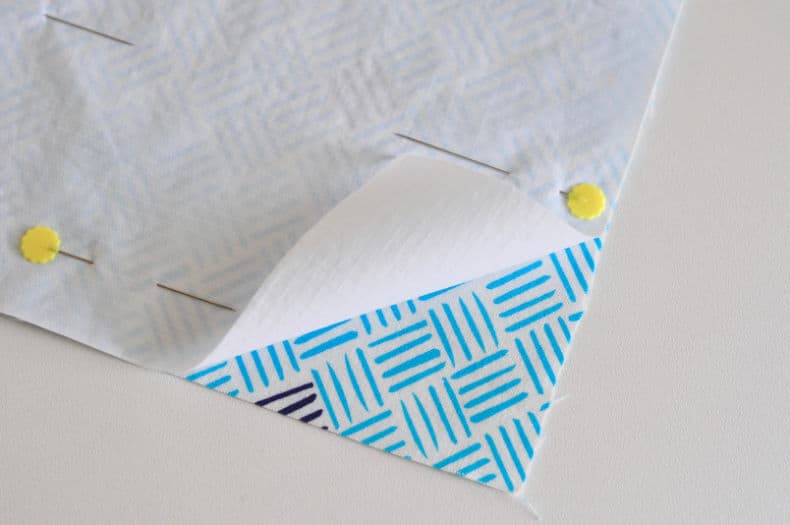
When all your fabric is cut take one of the cotton rectangles and one of the ripstop rectangles and place them right-sides together. Square up the sides and pin around the border.
Step 3:
Start sewing!
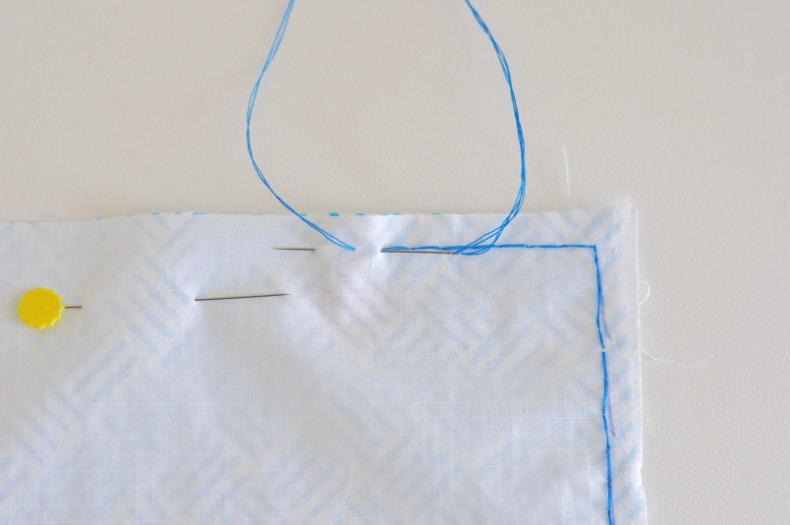
Leaving a 1/4” seam allowance, use back stitch to sew all around the entire rectangle, leaving a two inch gap in your stitching between where you started and where you end (so that you can turn your snack bag right side out). Hold your thread together double, and try not to work with a piece longer than a yard to prevent it from tangling on itself. The nylon has a natural grid pattern that can help in keeping your line of stitches straight, but feel free to draw a line as a guide with an washable fabric pen, chalk or a pencil. When you get to the end of your piece of thread, tie it off and continue stitching with a new piece. Once you’ve gone around the whole piece you should now have the two pieces completely sewn together except for a 2″ gap on one of the long edges.
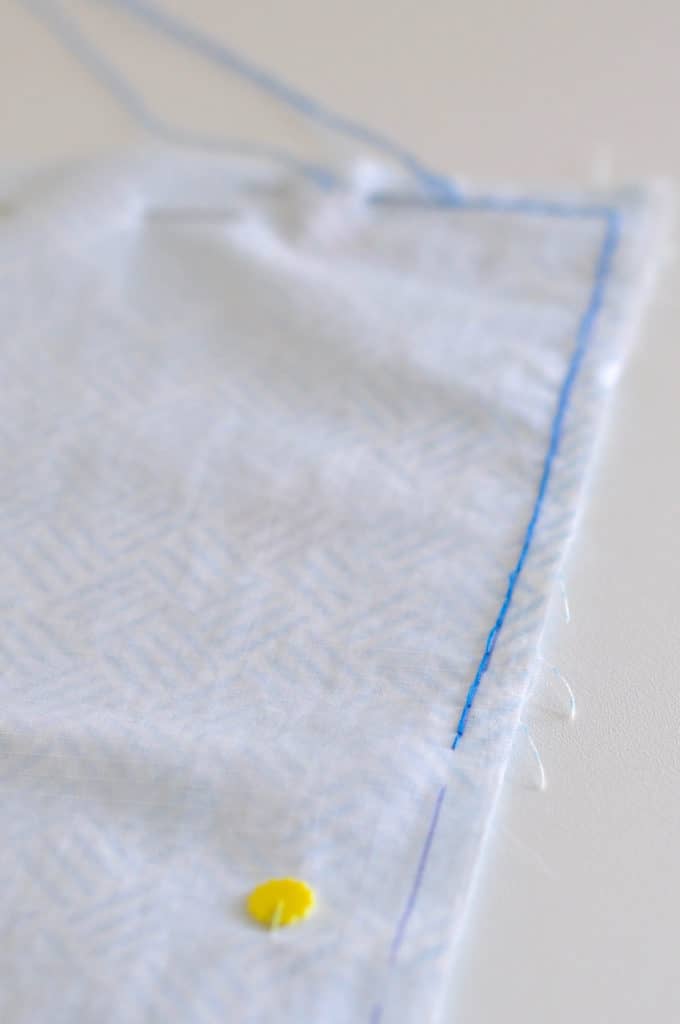
Step 4:
Next, carefully cut the corners off the rectangle, but be sure not to cut your stitches! Cutting the corners helps to make sure the corners of your final piece are nice and pointy when you turn the fabric right side out.
Step 5:
Turn your fabric right side out and push the corners out with your pinky finger, a small awl or the eraser end of a pencil.
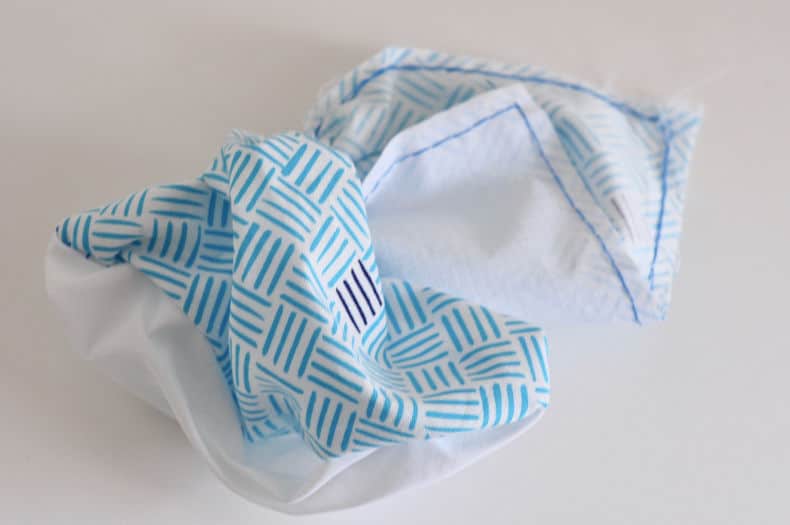
Step 6:
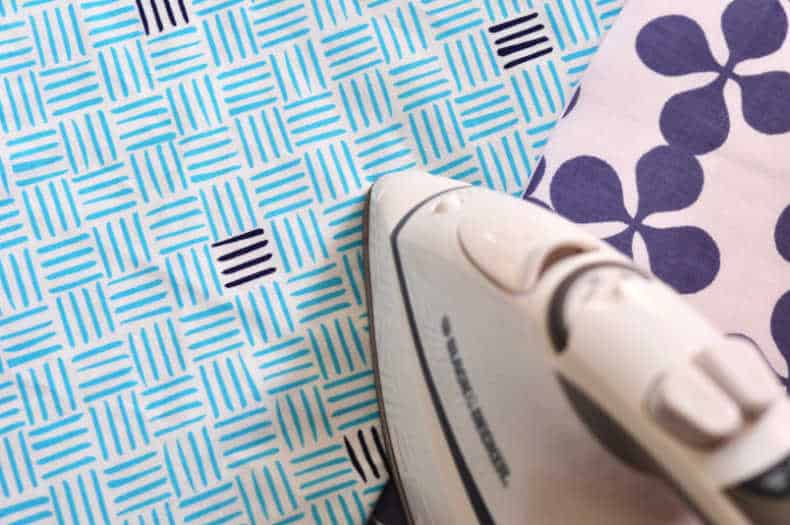
Take your rectangle over to the ironing board and iron out all the wrinkles. Be sure to iron the cotton fabric side, not the ripstop side.
Also make sure the seam allowance of your gap is folded in. Ironing helps make the fabric nice and flat and also makes it easier to sew in the next step.
Step 7:
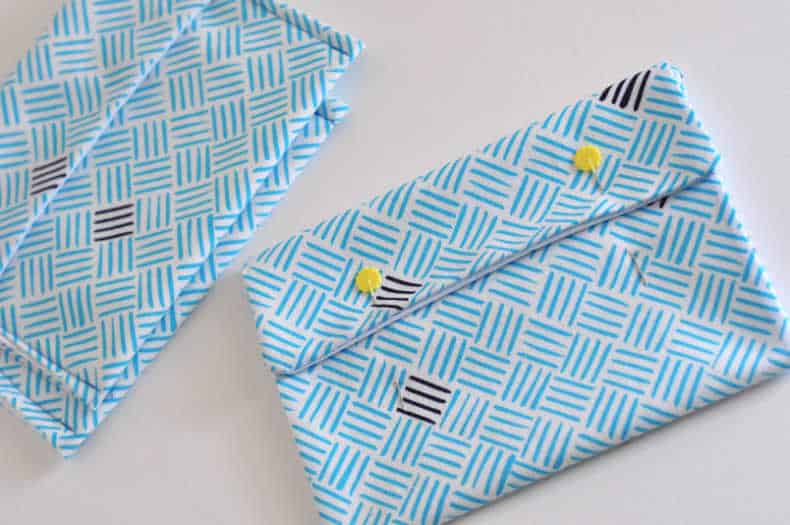
Once your rectangle is nice and ironed, place it ripstop side up on a flat surface and fold one of the short ends up toward the other short end, leaving about two inches at the top.
Then fold that remaining two inches down over the other end, creating a flap. Your rectangle should now look like an envelope. Pin the flap in place.
Step 8:
With a new piece of thread held double, sew the sides of your snack bag together. This loop method from cross stitch is a great way of starting so that you don’t have a loose end on the right side of your bag. A thimble can help at this point if you find it difficult to push the needle through six layers of fabric.
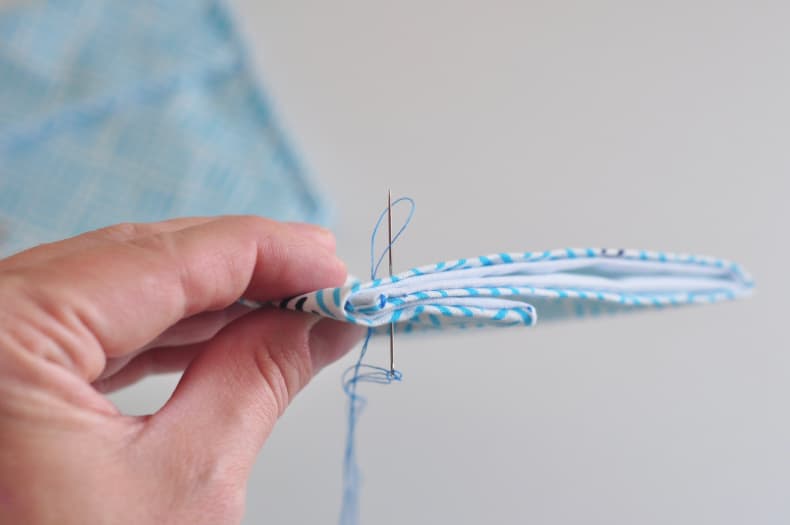
Continue down the edge using back stitch and sew the entire side shut (including the flap). Tie off your thread at the end and trim.
Do the same thing to the other side.
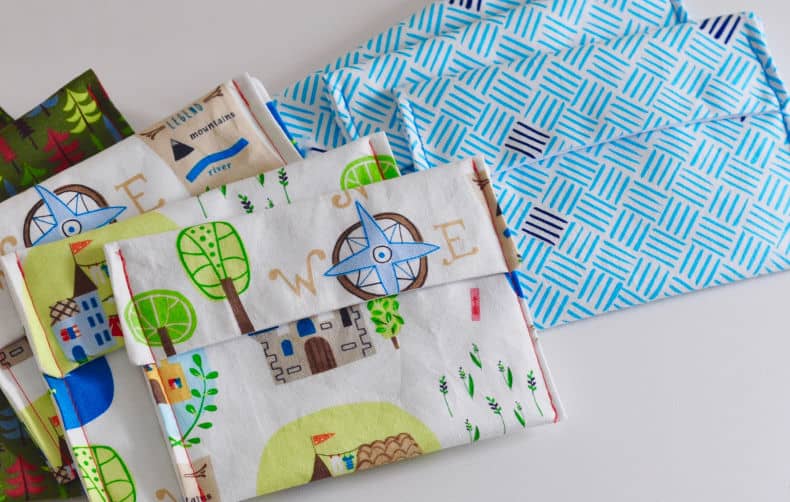
All done! You’ve made your very own reusable snack bag!
To open the bag, you just flip the flap up and push out the corners. Fill it with your kiddo’s favorite snack and you’re good to go!

Why I love these reusable snack bags:
- ripstop fabric is easy to wipe clean (or they’re machine washable)
- I love the flap because it keeps all the goodies in the bag and it’s easy for kid fingers to navigate
- The size is perfect for portion control
- The envelope style fits neatly in my purse or bag without adding extra bulk.
Note: These are not water proof, so if that matters to you, you might want to use PUL or vinyl for your lining fabric. For me, it’s not a concern, so these little baggies will work just fine!
For more simple projects like this, check out these posts:
No-Sew DIY Light-Blocking Curtains
Make Your Own Cloth Menstrual Pads
Easy 30-Minute Upcycled Baby Pants from an old Sweater
Cute & Simple DIY Coasters (with No-Sew Option)
Two Play-Dough Recipes {Gluten-Free & Original}
DIY: Re-Usable Play Mat for Cars & Trains
How to Make Your Own Beeswax Tea Light Candles












Brooke
I’ve made 3 of these snack bags using the machine sewing instructions and they’ve all turned out beautifully well.
Thanks so much for such a fab idea and great, clear instructions.
Lynn
Fantastic tutorial, thanks! I’d made similar bags with zips and velcro, but these are so much nicer for food.
Valerie S. Armagno
It clearly states at the bottom of step 2-3 to leave the gap on the long side. I have been sewing for about 57 years and I still have to read through the directions/steps at least twice. Then when you approach each step it is already in your head, as if you’ve already made the project. I do the same thing with baking and cooking.
sabrina
thank you so much, this project was just what i was looking for!! instead of using the ripstop, i am going to repurpose cereal bags 🙂 cant wait to whip these up!!
R&H Assistant
Happy to help, Sabrina! 🙂
Sharon
Where did you purchase the rip stop fabric? Thank you.
R&H Assistant
There are lots of options on Amazon but you should be able to find it at any local craft store. 🙂
Susan Lee
I am always striving for more ways to make our home environmentally friendly. These are a great solution! I made some from material I purchased here https://www.canvasetc.com/product-category/cotton-duck-canvas-fabric/ and they turned out great. The company Canvas, Etc. also had a 10% off coupon for new customers which was awesome!
Mel D
In the tutorial it is very confusing when you start to sew and you put the gap at the bottom of the short material…. and realize that it didn’t specify to put your gap along one of the long sides. I finished and realized that it never told me where to put the gap, so I had to figure out what to do with my now open pocket at the top…. where their picture shows a clean edge. ? But everything else was fantastic ?
Mel D
In the tutorial it is very confusing when you are start to see and you put the gap at the bottom of the short material…. and realize that it didn’t specify to put your gap along one of the long sides. I finished and realized that it never told me where to put that so I had to figure out what to do with my now open pocket at the top…. where their picture shows a clean edge. ? But everything else was fantastic 🙂
Callie Marie
Thanks for sharing such a useful DIY. By making your own custom snack bags, you won’t have to use up all of the plastic baggies so quickly. I might try making these in different sizes to accommodate different foods. I was wondering if they are hard to keep clean?
Rachel @ Intentionally Simple
These are really cute and look quite simple – wonderful tutorial! If I can get my sewing machine working (fingers crossed that I can), I will be making some of these to give as gifts. We already have a few reusable snack bags and get questions about them all the time!
Beth
I have a few as well (not homemade) and we LOVE them! They are so handy!
Grace
Love this! I’ve always wanted to make them, but I am just not a natural sew-er. Also, I wanted to let Beth know that none of Red and Honey posts are coming up in my Bloglovin feed anymore. I had been thinking that there had been no posts for a long time, so I went to the actual site, and realized I’ve been missing all of them. Not sure if the problem is on my end or yours or Bloglovin but I wanted to let you know.