By Contributing Writer, Virginia Miner
When I found out I was pregnant last summer, I resolved to stick with reusable cloth pads for after delivery. There were a variety of reasons for this decision (I had always used disposable pads previously), but the biggest reason was that having all those disposable pads in the trash after delivery grosses. me. out. Cloth pads are also said to reduce cramping, and using them will save you a lot of money, both of which are definite perks!
I already have kids in cloth diapers, so the laundry doesn’t scare me. I researched some purchasable options, but in my usual style I eventually ended up deciding to sew my own.
I bought all my supplies from diapersewingsupplies.com, though I am sure you can get stuff on Amazon or locally, depending on where you live.
BIG FAT CAUTION: I am not a fancy seamstress! If you are, you may find my techniques distressing. I am sharing what worked best for me after some trial and error. If you have ideas for improving this process, please share in the comments.
Here’s how you do it:
You will need:
- paper
- a pen
- a measuring tape
- scissors
- thread
- a sewing machine
- PUL fabric–this is a moisture barrier
- wicking fabric–this keeps moisture away from your skin (I used athletic jersey)
- absorbent fabric–this is where all the blood goes (I used hemp fleece)
- pins
- snaps or hook-and-loop
The first thing you need to do is draw your pattern. You can just trace your favorite pad and add wings, or you can do what I did. Measure on your body how long you want the pad to be, and then measure how wide you want it at the widest in the front, how wide you want it at the widest in the back, and how narrow you want it at the crotch.
On a piece of paper trace out your measurements. Draw a line the length of your pad. At the top, draw a line across at the width you desire, at the middle draw the a line for the crotch, and at the back draw the line for the width of the back. You should have one long line with three shorter lines intersecting it.
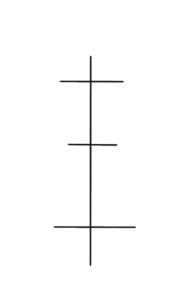
Draw a curved line connecting all your end points.
At the crotch line, draw “wings”: these will snap around the crotch of your underwear.
Now you have your pattern! It’s time to start cutting out fabric.
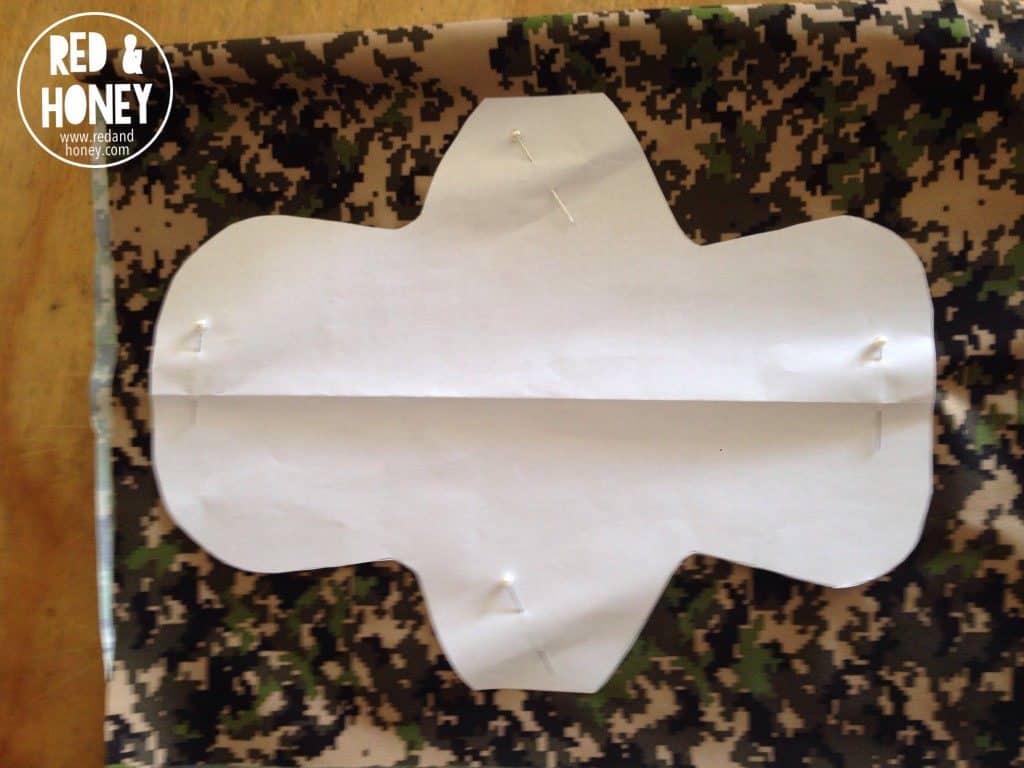
First pin your pattern to the PUL fabric and cut it out. You can see how cool I am: I chose digicam!
Then cut out your wicking fabric. Red seemed an obvious choice…
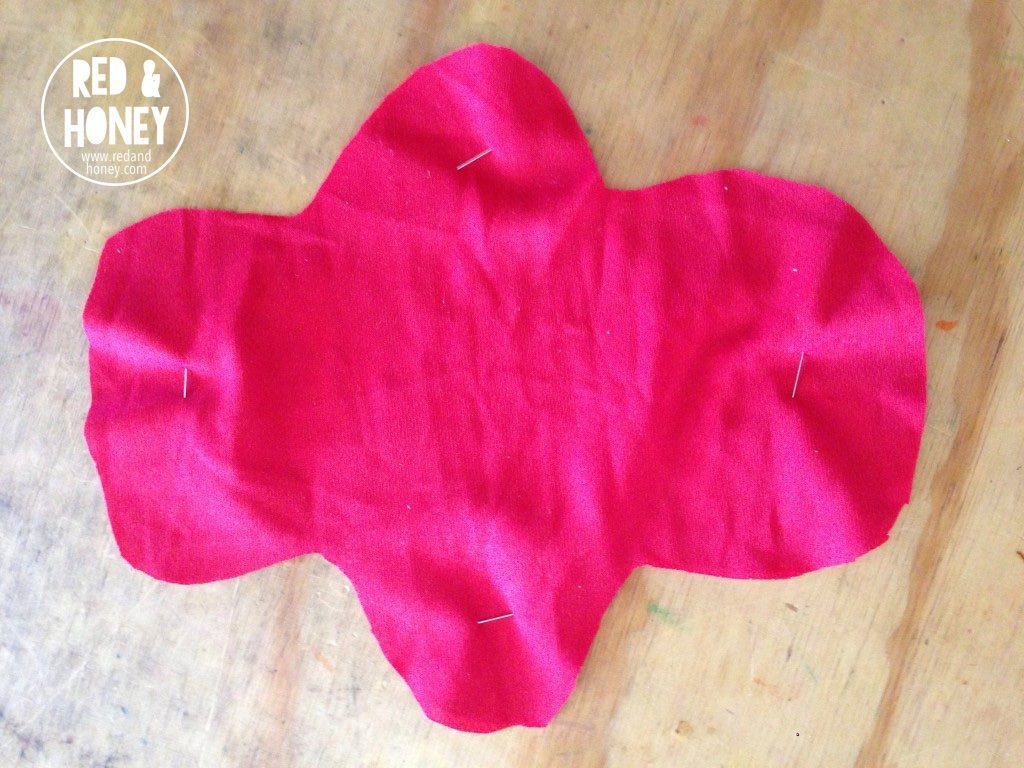
Finally cut out your absorbent layers, using the same pattern but minus the wings. I used 3 layers of hemp fleece for my huge heavy duty pads and two layers for the pad in the pictures.
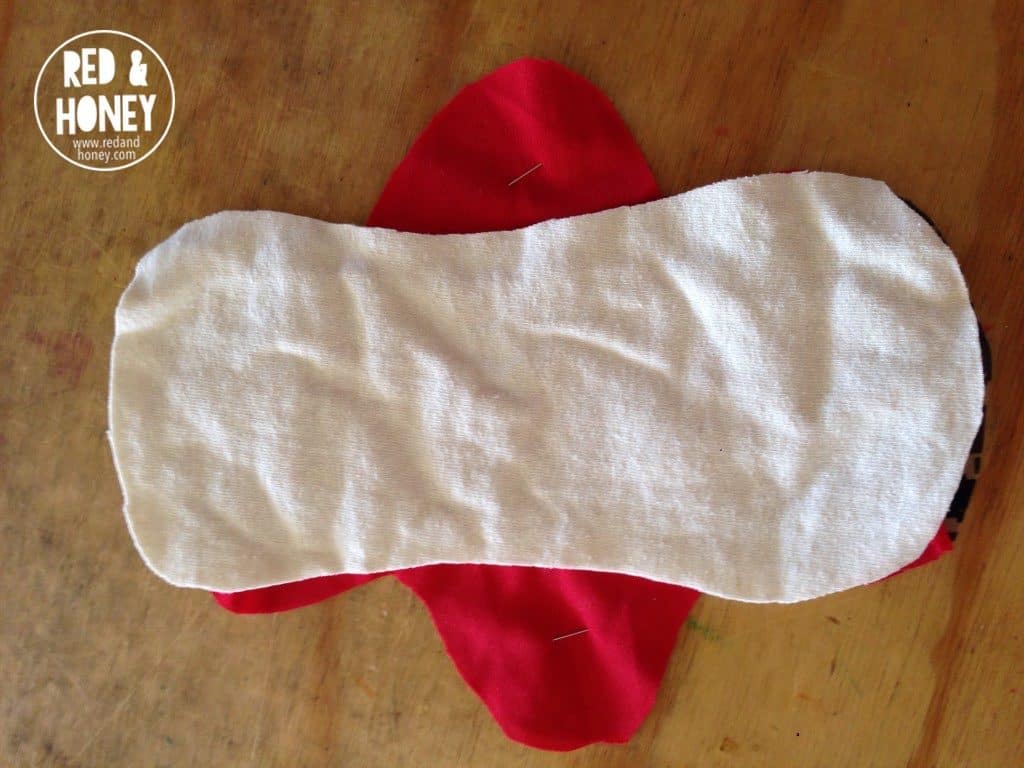
Now it is time to sew! Pin all your lining pieces together and sew them together all around the edge about 1/2 inch in.
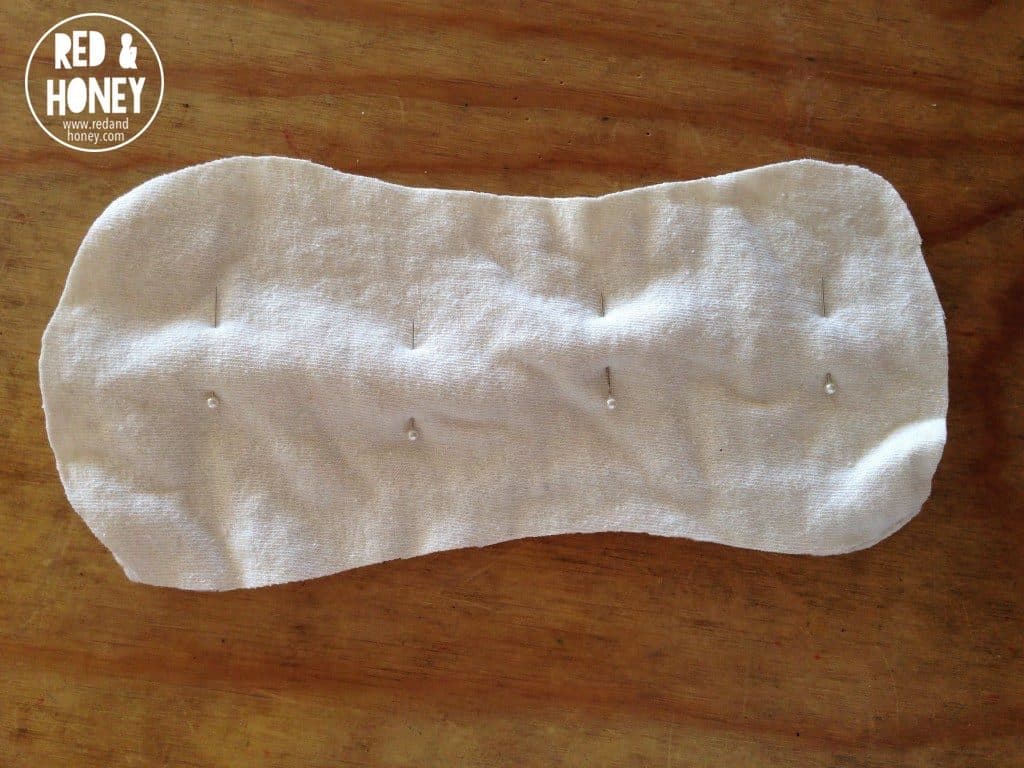
Next, trim the edges, close to your seam.
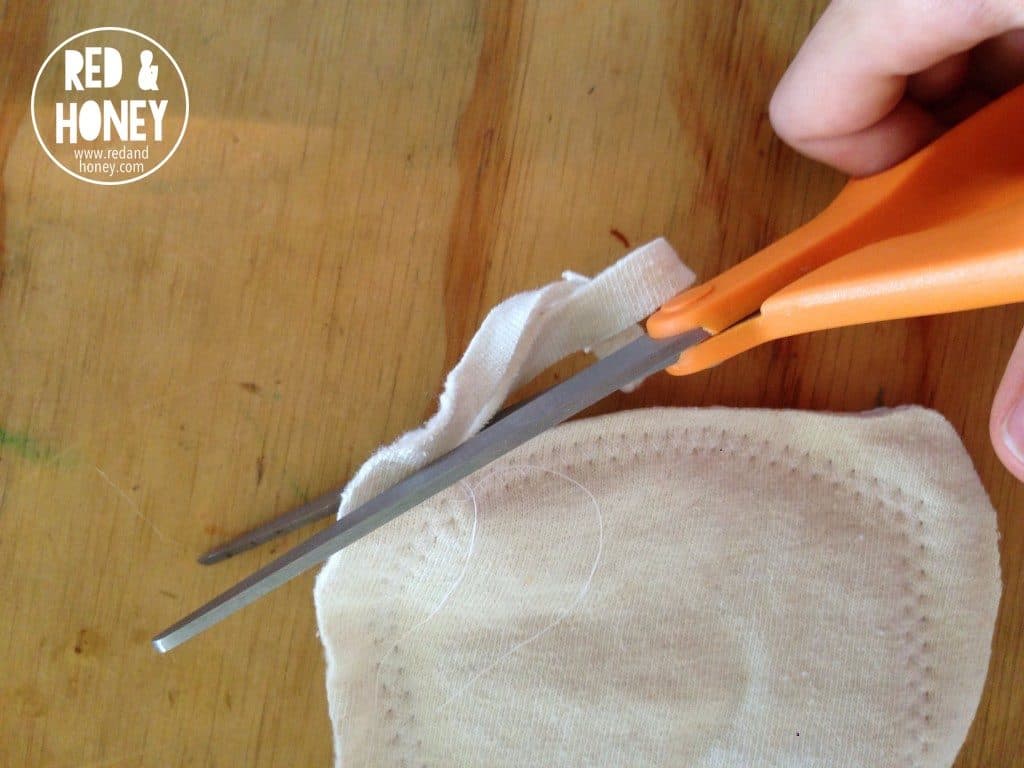
Once your absorbent liner is all trimmed up, it’s time to work with your PUL and wicking fabric.
Pin the PUL and wicking fabric pieces together with outsides facing each other.
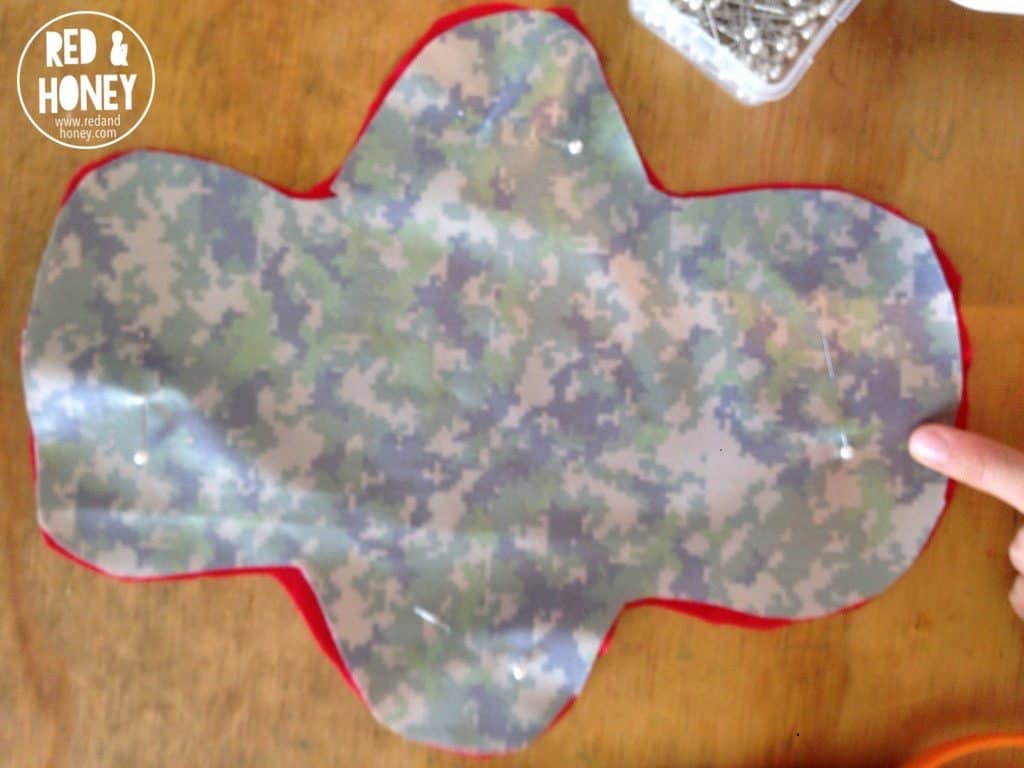
Sew these pieces together, leaving the back end open. You will use this opening to turn it right side out and also to insert the liner.
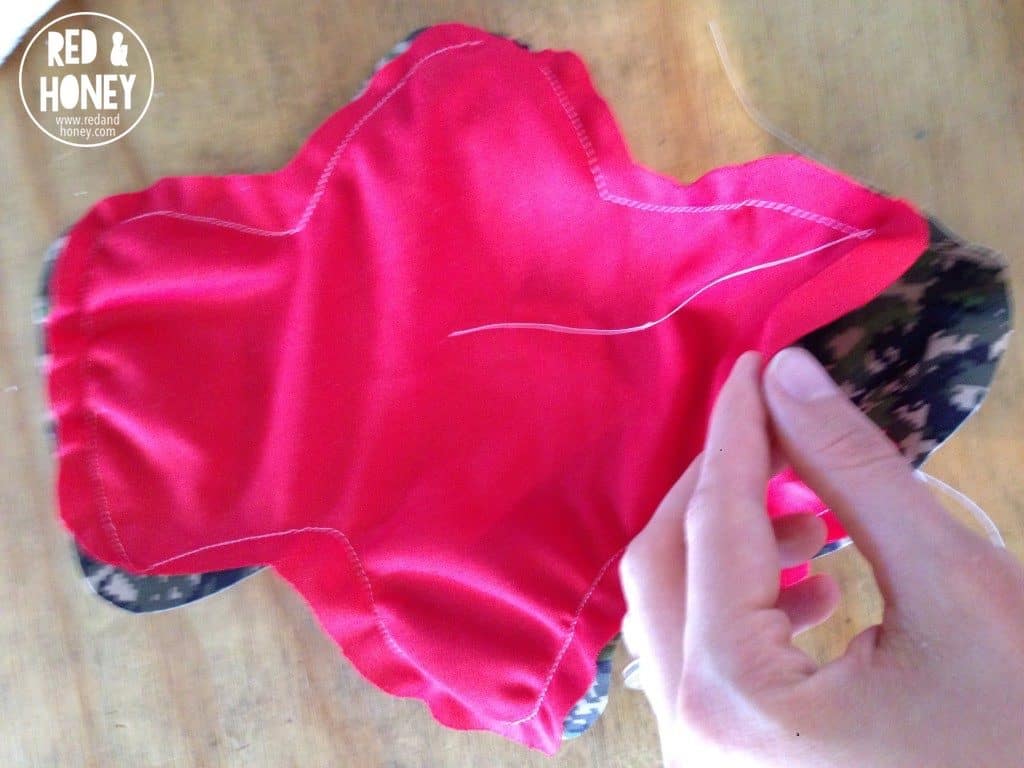
Once you have turned your shell right side out, you will insert the liner.
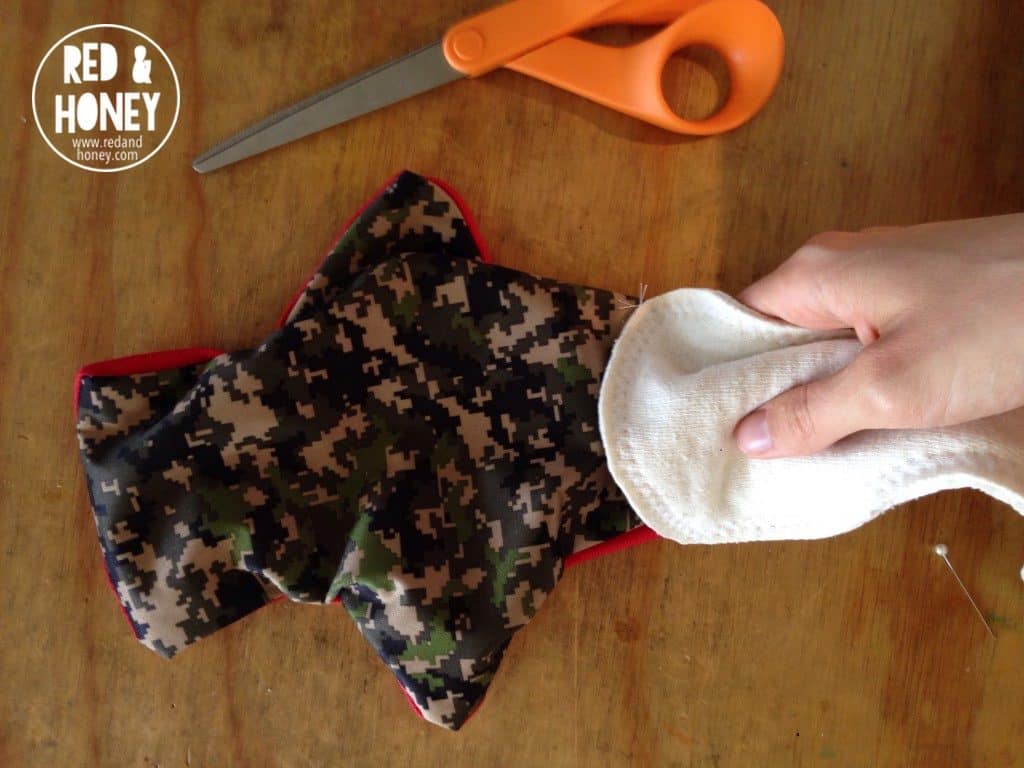
Pin it in place, and then sew around the edge.
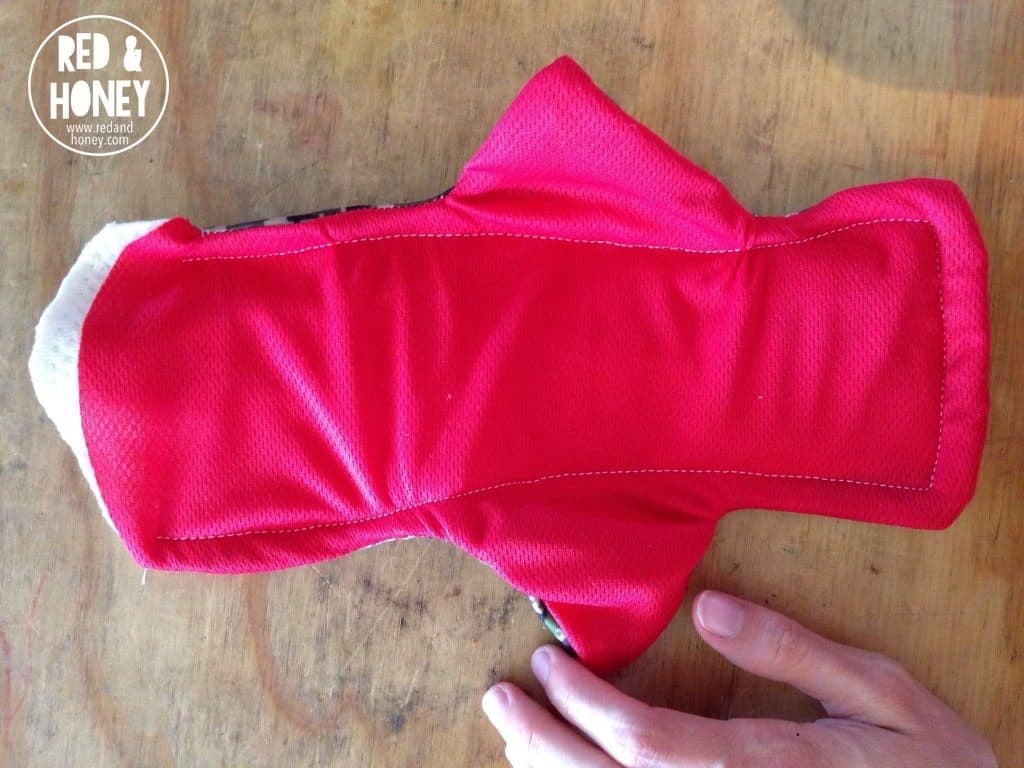
If you can fold the open edge in and sew it closed, do that. Otherwise, if you find that the liner is too long to do that, trim it to the length of the shell and then zigzag across to close it.
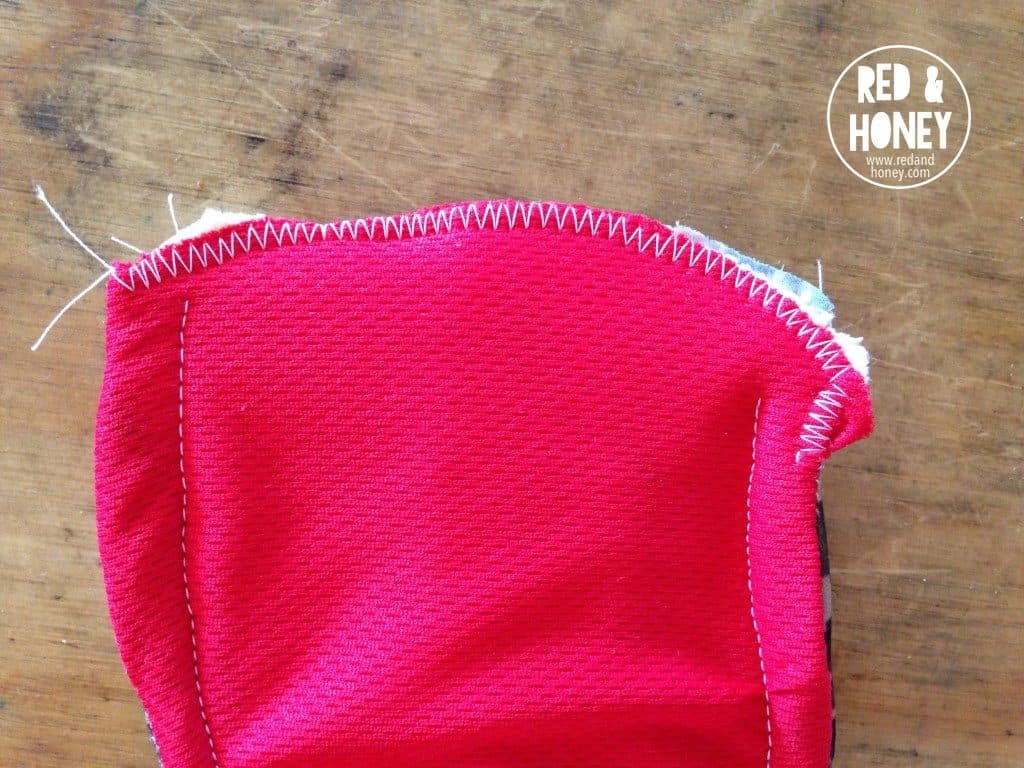
Not elegant, but it is effective. And the last thing I want to do is give myself grief about my sewing technique on sanitary pads.
To give the wings of your pad some structure, go ahead and sew a seam about a quarter inch in around the edge of the wings.
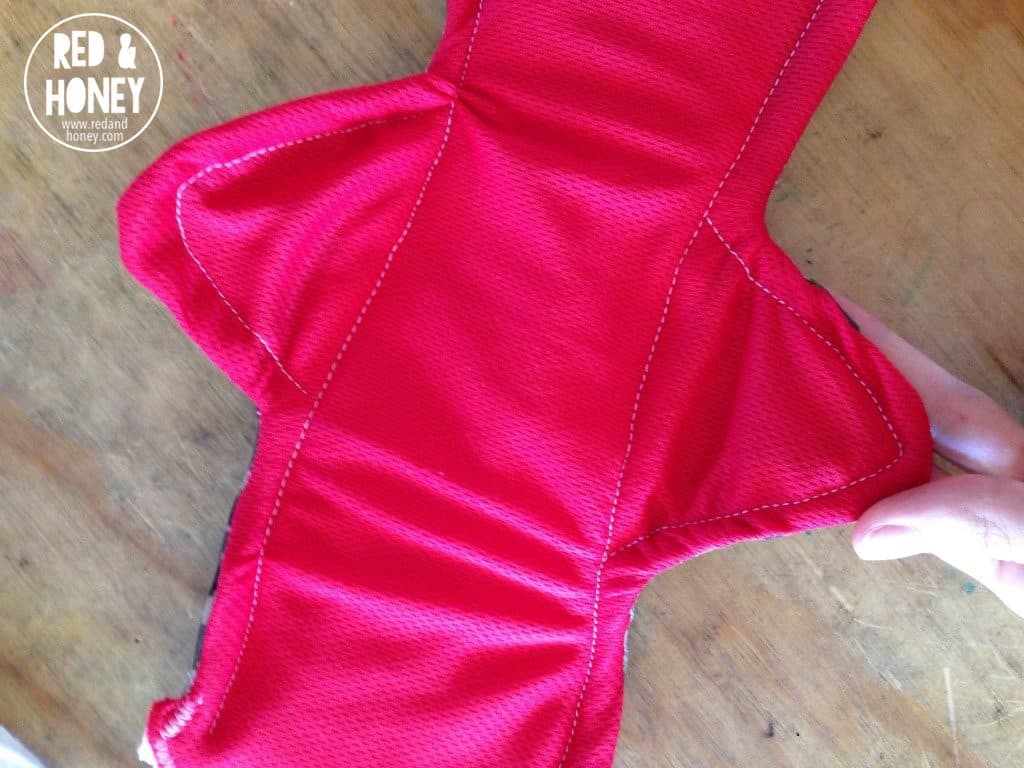
After you have done this, you can either place snaps, or sew hook and loop on the wings. I used KAM snaps.
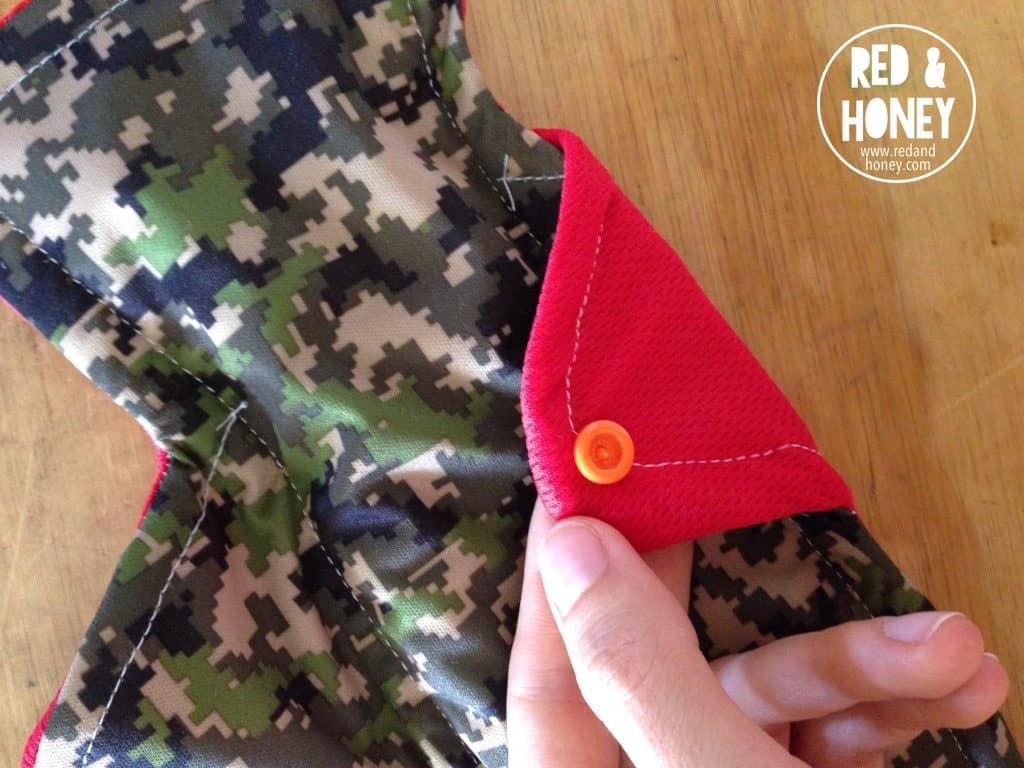
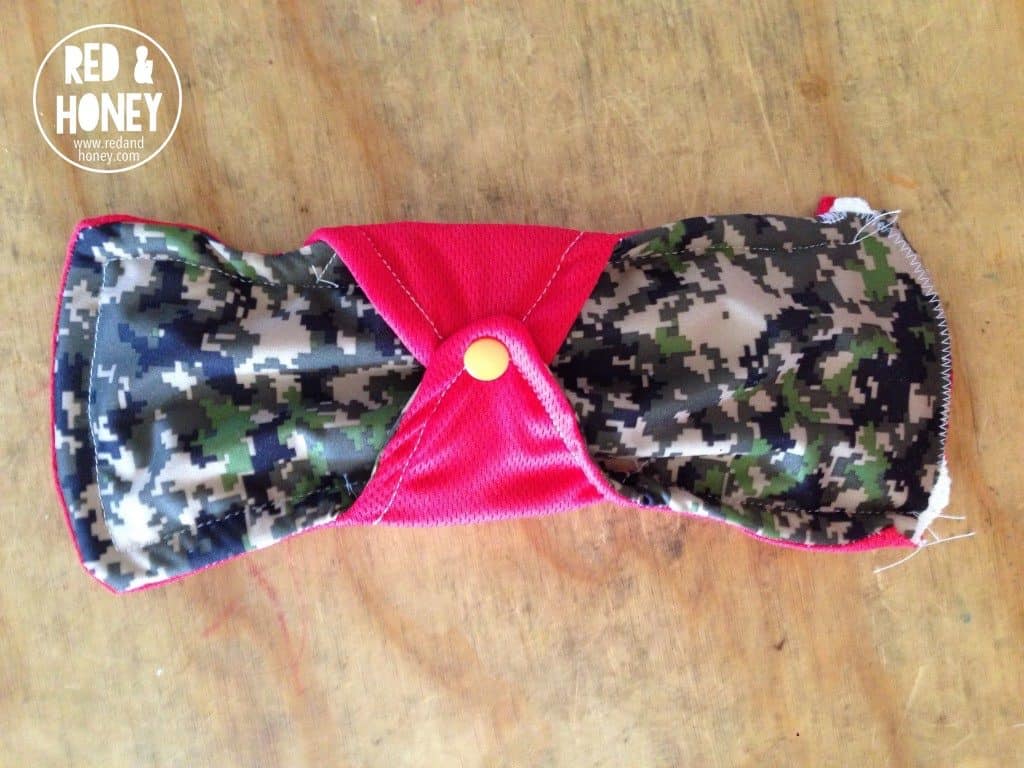
And there you go! You are done! These pads can be washed and dried like normal laundry, and they will be very happy if you hang them in the sun.
Make your own cloth pads – it’s quick, simple, and saves you a ton of money!
Have you ever worn reusable pads? Would you make your own?










Malogica Systems
I love this idea! Making your own cloth menstrual pads is a great way to reduce waste and save money. The personal touch of sewing your own adds an extra sense of accomplishment, and it’s comforting to know you’re using natural materials. Thanks for sharing this easy and practical tutorial!
Aman
Very beautiful I love it. I will make one for my daughter . Thank you
Allison
Hello!! So……I have read all the online instructions regarding making your own menstrual pads and, girls, this one is definitely the best. For someone who is not a sewing machine expert (truly a novice!!), these instructions are simply the most honest and best. Thank you for doing this for all of us and being the one who makes this endeavor possible for beginners.
Virginia Miner
Thank you for the kind comment! I hope it helps… I need to go make some more!
Christelle
This is awesome! We also make our own reusable menstrual pads. It took us a while to get it down though and figure out how to work the sewing machine!! haha 🙂 Here’s how we made ours: https://www.permacrafters.com/how-to-make-reusable-menstrual-pads/
Charmain
This is such a great idea and I am glad that many women are catching on. I have been using cloth pads for a while now and I totally agree that it is more comfortable then the dispoable ones. My 11 year old daughter just started her menses and we tried the disposable ones at first but she finds the cloth to be much more comfortable. My next step is to make these for myself and her and that when I came up on this post. Thanks so very much for this post. It is also a desire of mine to make these available to other women who are interested in transitioning but do have the time to make their own.
Eleanore Rosanova
Thank you the instructional was great.
Patricia Hubman
Beth,
We are going to make these to take on a mission trip. How many might a lady need? I am “too old” to try them out (LOL) but LOVE the idea.
R&H Assistant
It would depend on flow, personal comfort, and how often they can be washed. Most seem to prefer at least one for each day of the cycle, though other women use three or four per day. I hope that helps!
DeLana
12 to 15 is what most women have, but in underdeveloped countries, several more would be good because they usually can’t wash as often. Add instructions to “dry store” in a bag (which can be made of PUL fabric) or a tub that animals and children can’t get into, until washing day, then soak in cold water at least a few hours, then wash in cold.
Sore Mom
I was in so much pain post partum that I COULD NOT use disposable pads (I had an episiotomy additional tearing from vacuum assisted delivery). I bought a huge package of them while I was pregnant and I’m going to donate them to a women’s shelter. My midwife recommended that I cut up some diapers and use those as pads, which I did and it was way more comfortable. This technique looks a lot more sophisticated! I don’t think I can ever go back to the other kind so I’m planning to make some of these as soon as I get the fabric in the mail. Thanks for sharing!
Sore Mom
Midwife recommended cloth diapers**
Jackie McKinney
where do get the special fabric???
DeLana
Online or fabric stores. The most common waterproof layer is called PUL and other fabrics can be just simple cotton broadcloth for outer layer and flannel as our later or absorbent core. There are also fleece, suede cloth, minky and many more. If you use Facebook, look for “cloth pad” groups or just Google how to make them. There’s so much info available online.
LaTonya
Can you make without a sewing machine
Shailja
I know it’s too late I am answering but it’s never too late to make a switch to cloth. So yes, you can handsew the pads. Many teenage girls do that. It takes a little bit longer time but it works.
Kar russell
Why not design pads for women who have incontinence?
Virginia
These could definitely work! I would make the front a little bigger and maybe add an extra layer for absorbency.
Janee
First I want to say how awesome it is to see someone I’ve been following for awhile blog about this. If any of your other readers want to research and look into sewing their own we have an amazing facebook page with so many helpful people to ask questions of and learn from. I will warn you though that if you really like sewing you may find yourself addicted to making them. The page is:
https://www.facebook.com/groups/SewClothPads/?ref=bookmarks
There is also a sister group for discussing menstrual issues called C.R.A.M.P.S if you are ready for open discussions on this subject.
It is true that many women have experienced shorter periods, lighter periods, and less cramping after the switch. This isn’t true of everyone however. In either case it is much less expensive (even if you buy instead of sewing) than disposables since the pads will last for years if made well. I’ve been sewing my own for over a year and I have to say I will never go back to sposies. These are so much more comfortable and customizable. Some women even forget they are wearing them….never said by anyone ever wearing a plastic disposable pad.
And….just to put it out there. Some of us are even a little more crunchy and use cloth toilet paper. HUGE savings, much healthier, better for the environment. Not a huge leap when you already cloth diaper.
There are also lots of other reusable cloth products once you wrap your head around these.
Sorry if I’ve hijacked your blog but this is something I’m very passionate about and hope to convert as many ladies as possible. Reusables are so much better for you body, the environment, and your pocket book!
Janee
I will also mention that the above group has free patterns in the files if your unsure about making your own. There is also information on what materials you can use for different layers. If your into upcycling you can make them from things you already have around the house. There are also many YouTube video’s by Amy Nix and others on techniques that you can watch and learn from as you go along.
Virginia
I used these cloth pads for all of my post partum bleeding and it was SO much more comfortable! Plus, I still have all the pads for next time I have a baby.
Laura Foley
I TOTALLY agree with you!!!! I’m working on ‘family cloth’ and sewing more cloth pads for myself. I made some about 5-10 years ago. But they were not ‘fat’ enough and I need more. About 4 years ago I started clotting and having heavier periods. And in 2015 I had a third child. Never thought at 43 I’d have another child after a 21 and 18 year old ‘children’.
So, needless to say I’m in need of more absorbent pads. I do wear a diva cup, so great as well. Still getting back into inserting after being pregnant. I’ve used the Diva cup for about 10 years, I do believe. Cloth pads and the Diva cup have greatly reduced or stopped my heavy cramping. I love them!!!
MamaV
I loved the diva cup until I had some prolapse with my 2nd birth… it was super uncomfortable after that! I like menstrual sponges now, with a light pad for backup.
Andrea
Good to know! I use the Diva Cup and so far it’s perfect for me. – Andrea, R&H Assistant
Ellen Dunbar
HI, I want to send cloth pads for school girls in South Sudan and can’t find any in the DC – Maryland-Virginia area, and after perusing I found that they are usually made by non profits. Anyhow, I stumbled upon this and can’t express enough how impressed I am. I am going to purchase materials to make several for the girls I sponsor in Sudan. Unfortunately, I won’t be able to make too many due to the short notice given me. But I am looking for short cuts and best, quickest means of getting supplies locally without ordering. Please inbox me on Facebook, I have a short time to make as many as I can (I’m experienced in sewing but this pad business is new to me). If anyone wants to join in to support or make some, please let me know
Kathy
My mom makes the menstrual pads for both of us and have discovered velcro as a better and easier fastener, We have been using the pads for years and they are far more comfortable than the store bought.
Virginia
I used KAM snaps because I had been making lots of diapers and had them laying around… One question about the Velcro: do the pads all stick to each other in the wash?
Kathy
Yes, that is a drawback to the Velcro. And it can stick to anything else too. We usually put them in a small washable bag with the rest of the laundry.
Tasha
Dumb question probably. Do you rinse most of the blood out (in the sink) before adding them to the regular laundry? What about staining?
I’d like to make some for my daughters. Thx.
MamaV
I have not had issues with staining if I wash them within a day or two. If you wanted to wait longer to wash them you might put them in a little bucket with some baking soda and water to soak. Never wait longer than three days.