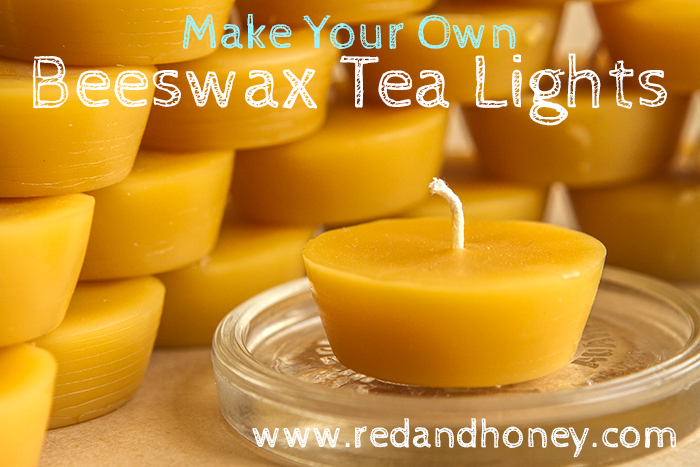
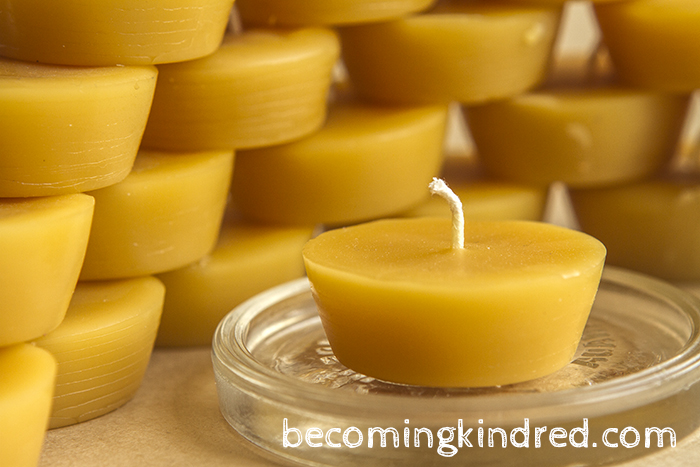
This simple tutorial for homemade beeswax tea light candles will light up your life. (Pun totally intended. You’re welcome. ;))

This is a guest post from my friend Marissa of Becoming Kindred
The scent of beeswax is so warm and comforting to me.
I enjoy using beeswax candles for that reason, but they are also a completely non-toxic, air cleaning, and renewable resource that I can purchase locally.
Beeswax is produced by the female worker bee for the honeycomb which contains the honey and all the baby bees that the Queen bee had. Did you know that in order to make one pound of beeswax , the worker bees eat around ten pounds of honey, fly 150,000 miles and retrieve nectar from something like 33 million blossoms? Amazing!
Anyways, enough fun facts (although if you are intrigued just do a search on apiaries) and onto making beeswax tea lights.
I started out using beeswax to make floating candles in walnut shells, then made hand dipped candles with a friend, and that turned to making birthday candles.
After that, I knew I had to try making homemade beeswax tea light candles and they worked out so beautifully and easily too! I will warn you though, candle making is a little addicting. There is something so peaceful about working with this gorgeous bit of creation and they really are quite simple to make. I love knowing that I can make inexpensively beautiful and healthy candles for my home.
 {Supplies}
– Beeswax
– #4 Wick
– Hairpins
– Scissors
– small muffin tin (I use a 24 tin)
– Tin Can
– Newspaper
{How to}
1. Layer your area well with newspaper. Of course the idea is to avoid any spillage but this is essential because it makes cleanup a breeze.
2. Place your beeswax in a tin can and warm in the oven at 180 F. Don’t heat it higher than this because it will burn the wax. I usually place a piece of tinfoil under the can to make sure that no drips get in the oven.
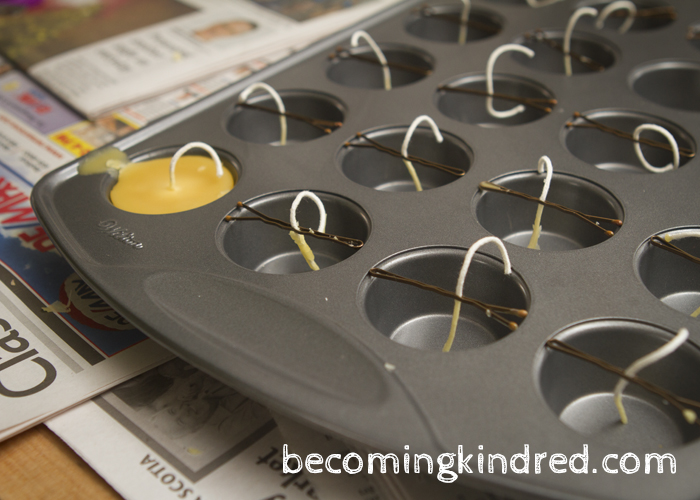
3. Prep your muffin tin with wicks.
– Cut the wicks about 1 1/4 inch in length or just a bit longer than the height of your muffin tin.
– Thread each wick into a hair pin.
4. Once the wax has melted, dip each wick to the height you want the candle to be. Mine are about 3/4 inch thick. Straighten each wick as you dip it and lay the hair pin across each muffin cup, centering it. 
5. When you have the muffin tin prepped with the wicks, pour the wax into each cup. The beeswax hardens fast so it is important to work quickly and carefully. 
6. Allow the candles to cure by leaving them to harden for at least an hour. Remove the hair pin and they should quite easily pop out. Trim the wicks if needed.
And now comes the next fun part! Light and enjoy these little beauties yourself or share them as happy little gifts.
Looking for more DIY ideas? Check out these links:
Easy 30-Minute Upcycled Baby Sweater Pants (By Hand or Machine)
Two Play-Dough Recipes {Gluten-Free & Original}
Easy DIY Reusable Snack Bags (Machine & Hand-Sewing Instructions)
Cute & Simple DIY Coasters (with no-sew option!)
DIY: Re-Usable Play Mat for Cars & Trains
***
While learning to live a simple farming life in rural Nova Scotia, Marissa finds home where ever her beloved, Dan and three darling daughters are. She writes about her journey of life as a wife, mother, woman, novice farmer, homemaker, & Christ follower at www.becomingkindred.com.
![]()

Ang
Will these float
Fiona
Hello Marissa/Beth!
My wicks start ‘swimming’ after the candle has only burned half way and then dissapears into the wax, not for me to re-use if i’m not fast enough there to rescue! I did stick to the tutorial. Does anybody else have this problem? Can you please tell me what (probably) has gone wrong? It is such a waste now..:( Thank you!
Marissa
HiFiona,
I’m not really sure what could be happening, it’s not an issue that I’ve had. You’re dipping the wick in wax before hand?
You can always melt the wax down again so it’s not totally a waste but frustrating for sure!
Y
eLise Reeves
It might be because your wick was too thick. The smaller the wick the smaller the flame, if you have a thick wick it will liquify your candle and burn too hot and that makes your wick float away. Alternatively, it could be the container you burned them in, if the container holds the heat, it can do the same thing. To prevent it, you can use the little metal wick holders and that helps hold them in place
Jules
Hi Marissa, what a great tutorial. I have just ordered some pure beeswax and hemp wick and plan to have a try at making these. Do you find that the wick falls over as the candles burn or do they remain upright all the way through the burning process? Many candlemaking instructions require wick stabilisers but I prefer your method as there is no waste ( I presume these little metal stabilisers get discarded after the candle has burned down). Also, I wonder if it would be possible to melt the wax in a glass pyrex jug instead of a tin? Has anybody tried that? I don’t think I have a suitable sized tin.
Thanks for posting such a helpful tutorial x
Abbey
Hi! Do u have a link for the tealight holder ? Do they drip?
Thanks ! Any video’s on you making them ?
Beth
I don’t have a link or a video, sorry! I think any tea light holder would do. 🙂
Carrie
Where do you purchase your wicks from?
Becky
Wondering how long the headlights will burn?
Becky
Wondering how long the tealights will burn?
Sonesta
This little tutorial is the BEST and easiest recipe for making beeswax tealight candles! Thank you so much! I love the idea of the hairpins! Brilliant! Reusable and something we usually have on hand anyway.
A couple questions: 1. What type of wick do you use, i.e. size (pure cotton, I’m assuming)? 2. What temp do you set your oven at? 3. What size tin can did you use in this tutorial and how much beeswax? Thanks so much for sharing this!
Sonesta
So sorry…I reread the post and you already mentioned the oven temp.
Nicole
Hello Marissa,
Thanks for sharing!!! I have been looking for instructions for beeswax candles for a while, and yours were perfect!
Excellent suggestion for the newspaper — it made clean-up a breeze.
A 1lb block of beeswax took about 2 hours to melt in the oven, and made approx. 19 tea-lights and 2 medium votives.
Thanks again,
Nicole
lisa
how much beeswax do i need?
lisa
can i use candy muffin pans or only non stick muffin pans? Can I add essential oils?
Maggie
two questions, when burning do they need to go in a small candle holder, since the tea lights are not in a plastic or metal container…also, do you know if these would work in something like a scentsy burn or tart warmer? and can you scent them with essential oil (so it was 3 questions 😉 )…
Marissa
Hi Maggie,
I usually put mine on a little glass holder just so that the wax doesn’t melt onto the furniture. You don’t need to worry about them being a fire hazard any more than any other candle because the wax puts the wick out at the end.
I use these in warm my essential oil scented wax in a scentsy type burner. They work well.
I originally tried scenting my candles but I find that they lose their scent quickly, I don’t find burning them actually makes much of a scent and it is alot of EO’s for not a lot of scent so I starting making my own wax melters for my burner. Just beeswax and your choice of essential oils…lasts for days and you can always add some more drops of oil if you so choose. I sold them at our local market and they were very popular. I actually posted a little about it on my own blog here, http://becomingkindred.com/?offset=1387161003767.
Hope that answers all of your questions!
Marissa
Maggie
thanks, it does…I have a lot of scentsy warmers…and wax still, but I read how these actually purify the air a few weeks back and really wanted to try some to help hubby with his asthma…now to find a local bee keeper…
Marissa Froese
Yes, beeswax is does have air cleansing properties and it’s also possible that that the scentsy wax could be causing irritation for his asthma…(I know that it did for me in the past)…so it’s definitely worth a try! There are some essential oils that are claimed to help asthma but you might want to just start with the beeswax, it has it’s own lovely scent anyways:).
Sarah Kate
Hello Marissa,
How long does it usually take to melt the beeswax in the oven? I teach at a school where we use bees wax candles everyday so this will be an economical way to bring light to our children!
Warmest regards,
Sarah Kate
Marissa Froese
Hi Sarah Kate,
I honestly can’t remember exactly and haven’t made any since getting stocked up in February but I think around fifteen minutes or so?
I’m going to be making candles for market in the next couple of weeks so I’ll pay attention and edit the post with how long it takes then.
Wonderful that you will be able to share them with the children that you teach!
Jordan
thanks for this post! where do you purchase your beeswax from?
Marissa
I usually get mine from a local beekeeper by the pound. I know that you can often find it at craft stores but I prefer to go directly to the beekeeper if you can find one in your area.
jane G
So excited I have a chunck of bees wax left over from making my own lip balm. cant wait to try this. Another great gift idea from bees wax and natural. thank you
Beth
Thanks for reading, Jane! Come back and let me know how it goes! (And I love that you make your own lip chap – that’s something I’ve always wanted to try!) 🙂
Marissa
And I’m planning to use my bits of beeswax left after I burn some of the candles for making lip balm and hand salve! I love multi purposing!:)
Marissa
They really are so easy and fun!
Dea
LOVE this!!!
The ‘tin can in the oven’ is genious! I use beeswax for about 50% of my products and it takes soo long to melt it down in the double boilers. This is great! Can’t wait to make some this week!! I’ll be sharing this for sure 🙂
Marissa
Yes! The oven works really well! And my dear husband then came up with the idea of using pliers for pinching a spout for better pouring.
Another thing that works very well for melting wax is an old crock pot. I have one just for that and it is great for keeping it melted and also for mixing up batches of salve etc in.
Beth
Pinching a spout is a really great idea. Smart hubby you have there 🙂
Sue
Bending a spout is old school ’70s hippie style. How I made sand candles as a kid.
Stephanie
Wow, who knew it was so easy?! These look so fun.